Dip It
Resin - How To Instructions and ideas
 |
Remember the craft from the late 1960's,
early 1970's where you dipped wire into resin and made all
sorts of items from flowers, to jewelry? Well, its back!
New ingredients so its not toxic. Here are some
instructions to help you remember how to do it.
|
Home |
|
Product Index: A - B - C - D - E - F - G - H - I - J - K - L - M - N - O - P - Q - R - S - T - U - V - W - X - Y -Z
Dip It Fantasy
Film Resin
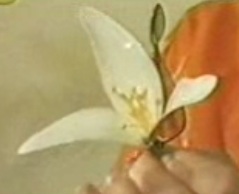
Dip It Fantasy Film is a special
liquid plastic which produces the
so-called 'Tiffany-effect'.
It is used to make flowers,
jewelery and other decorative objects. Paint the dryed film with
acrylic paints using a chenille stem as your paint brush or
string bugle beads on your wire before you dip it to add a
different effect!
Back to Dip it
Colors


Materials needed:
metal-wire (5 or 6 mm)
flower stamina (Hobby-shops); instead of stamina or as body for
butterfly (head/thorax/abdomen) pearls may be used
floral tape
pair of pliers
- Floral foam or Styrofoam
Optional: ribbons, spangles, pinking scissors, various floristic
attributes
Cut off piece of
wire and bend according to a
drawing or some other model, into the
desired shape
|
|
The dimension of the
piece of work depends upon the width of the Dip It
container. For bigger objects you can use old soup bowls
or glass pots with a wide opening.
For an undulating wire use pinking
scissors, or wind the wire around a round object (a
knitting needle or a pencil will do fine).
|
|
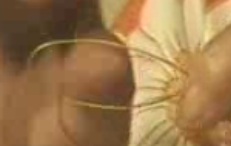
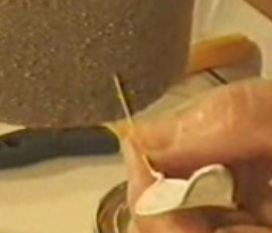
Dip the wire into
the Dip It Fantasy Film container down to the base of
the twisted wire.
|
When pulling the wire from the
container, take care that the membrane which has
formed inside the wire does not come into contact with
other objects.
|
Important: the object should be
dipped into the liquid only
once!
To achieve various shades of color, the shades have to be mixed in
the liquid containers, directly.
|
Stick the wire into
a block of Styrofoam and leave
to dry for at least 15 minutes. Always close lid of
container well.
For better preservation of the
object, dip it into
Dip It Strengthener and leave to dry for another
30 minutes. After the strengthener treatment, the
still damp object can be decorated with some
glitter-powder Or you mix varnish with some
glitter-powder in a bowl and apply it with a brush.
For jewellery, dip the object 3 - 4
times into the Strengthener.
|
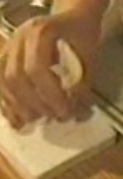
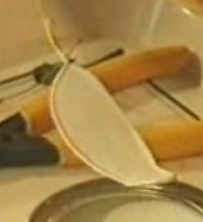
Petals are stuck into the styrofoam
sideways to dry to keep the film in place. When you
dip the petals in the Strengthener, stick the petals
straight down into the styrofoam. The excess
strengthener will run off the petal.
|
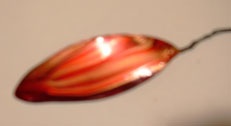
For special effects, for instance the
stripy pattern typical for Murano glass, you only have
to let a few drops of a different color fall onto the
basic color after you have taken it out of the
container; or mix, a high-gloss transparent color with
some opaque color of the same shade of Dip It.
Do not stir before using.
|
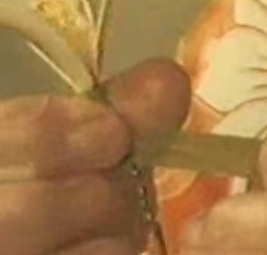
Final assembly:
Bind together the stamina with floral
tape. Arrange petals around stamina and wind with
floral tape.
At certain intervals attach Dip It
leaves to the stem, fastening them with floral tape.
|
|
Remember, in nature,
nearly everything is erratic!
So have fun and be creative!
|
|
 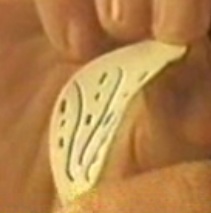
You can add color and contrast by
painting your petals with permanent marker in various
colors
|
|
We accept
Visa, MasterCard, Discover, and Paypal.
Minimum
Order is $10.00 before shipping
75 Kinsey
Drive * Gettysburg, PA 17325 * 717-334-7473 contact us
 .
.  .
.  .
. 
Home • Site Map • Customer Comments
|
|
|
|
|
|
Books
Human Figure in Clay
Wonderful Wings
CD's
Dragon Bust tutorial
Painting Polymer Clay
Needlefelting and clay
|
|
|
|
Sculpting
Tools
armature wire
loop and wire tools
12 pc wax set
clay shapers
mini detail tools
|
|
|
|
|
|
|
|
|
|
Molds
Makins Clay molds
silicone rubber molds
|
|
|
|
|
|
|
|
|
Gallery - Order information - Links
The Clay Alley
Copyright © 2023 All rights reserved.
Revised: Sept 23, 2023
.